You are here: 1. Distribution System > 1.3. FILE Menu: Master File Maintenance > 1.3.1. File - Inventory > 1.3.1.8. File - Inventory - Purchasing > Warehouse Details > Enter Multiple Bin Locations
Enter Multiple Bin Locations

Multiple bin locations are a system-wide feature that allows for a higher degree of control over stock levels within Micronet. Each warehouse will have a list of bin locations assigned to it and each item within that warehouse can then be assigned to any number of those bins.


Technical Tip

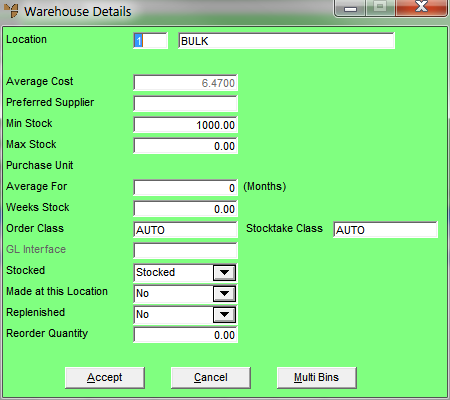
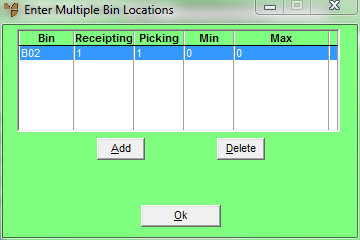
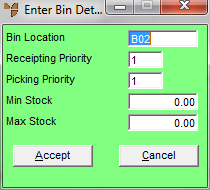
To enable multiple bin locations, the Allow Multiple Bin Locations per Item and Available Bins Display Order fields on the Inventory Configuration screen must be set appropriately – see "Edit - Program - Inventory".

In addition, your bin locations must be set up already in the Warehouse master file – see "File - Warehouse - Bins".

To enter multiple bin locations for an item:

  1. Display the Warehouse Details screen for the relevant item.

Refer to "Warehouse Details".

  1. Select the Multi Bins button.

Micronet displays the Enter Multiple Bin Locations screen showing all bins already set up for this warehouse/item combination.

  1. If you want to:

If you selected to add or edit a bin location, Micronet displays the Enter Bin Details screen.

  1. Complete the following fields:


Field

Value


Bin Location

This must be a valid bin location for the selected warehouse.


Receipting Priority

Enter the priority order for receipting the item into this bin (i.e. 1 to 10, with 1 being the highest).


Picking Priority

Enter the priority order for picking this item from this bin (i.e. 1 to 10, with 1 being the highest).


Min Stock

This field is for reference only.


Max Stock

For non-zero values, when receipting goods using the Priority Order configuration, the system will skip to the next available bin if this value is going to be exceeded by the receipt.

  1. Select the Accept button.

If you selected to add a bin location, Micronet redisplays the Enter Bin Details screen so you can add further bin locations.

  1. When you have finished entering bin locations, select the Cancel button.

Micronet redisplays the Enter Multiple Bin Locations screen showing all the bin locations added.

  1. When you have finished maintaining bin locations for this warehouse, select the Ok button.

Micronet redisplays the Warehouse Details screen.

  1. Select the Accept button to save your changes to the Warehouse Item Bin file.

Micronet redisplays the Item Update screen - Purchasing tab.